Most homes have a central heating and cooling system to keep everyone comfortable year-round. When you have a home that functions as a single unit, it’s also essential that the pipes that run through your house are well-insulated so that any heat or cool air doesn’t escape from one room into another. If your home feels uncomfortably cold in the winter or uncomfortably hot in the summer because of this phenomenon, it’s probably time to insulate your pipes!
While there are many different ways to insulate your home’s pipes, the most common is with foam rubber. Insulating your home’s pipes with foam rubber will help keep warm air inside your house and cool air outside.
What is pipe insulation?
Pipe insulation, also known as polyurethane insulation, is a thick, three-dimensional foam that’s placed inside your home’s pipes to create an insulating barrier between your home’s interior and exterior. The foam rubber is denser than air, so it keeps heat inside your house and outside your home.
Pipe insulations are made from polyurethane, a foaming agent that’s used in many household products. Polyurethane is a synthetic material that’s created by combining a number of different chemicals. It isn’t an animal product like wool or sheep’s intestine, which is often what is used to insulate old houses.
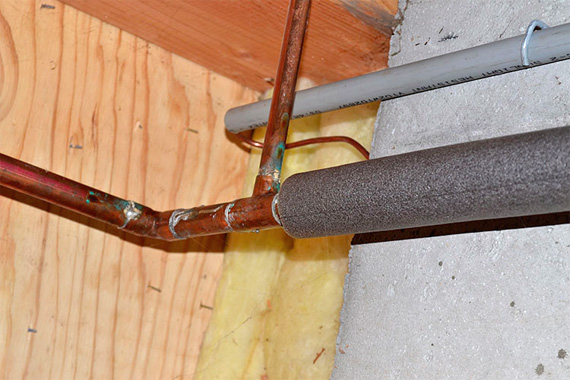
How to insulate your pipes
Once you’ve chosen copper or steel as your piping material, you’ll need to find a way to insulate your pipes. You can find ready-made pipe insulation kits at most home improvement stores, or you can insulate your own pipes from scratch. Before you begin insulating your pipes, it’s important to note that you can’t insulate pipes that are located outside your home. There are two ways to insulate your pipes:
1) Pipe insulation kits: These kits are pre-packaged, ready-to-use pipe insulation kits that include all of the materials you’ll need to insulate your pipes.
2) DIY pipe insulation: If you’re looking to insulate your pipes from scratch, you’ll need to find a way to cover the exposed pipes. It’s possible to insulate your own pipes with a variety of different materials, including urethane, mineral wool, expanded polystyrene, or polyurethane.
:max_bytes(150000):strip_icc()/water-pipe-insulation-2718695-04-d37538307aa04a73958c6cb2e90b9d5c.jpg)
Tools and materials you’ll need
- Pipe cutter: You’ll need a pipe cutter to cut the foam rubber pipe insulation. The pipe cutter will also help you finish the job by cutting the excess foam insulation off your pipes.
- Pipe tape: Pipe tape is commonly used to help seal out air from your pipes, which makes insulating them much easier. It’s important to use pipe tape that’s made for plumbing because it’s thicker and more durable than electrical tape.
- Pipe sealant: Pipe sealant will help seal out air from your pipes as you insulate them. There are different types of pipe sealant that are made for different types of piping.
- Pipe cutter blades: Pipe cutter blades are helpful for cutting the pipe insulation. The most common size is 6 inches, but you can also find blades that are 8 inches, 12 inches, and 18 inches.
- Pipe insulation: Pipe insulation comes in different diameters, depending on what type of piping you have. The most common sizes are 1/2 inch and 3/4 inch.
- Pipe wrench: Pipe wrenches are helpful for turning pipes that are stuck. Gaskets are commonly used for this job.
- Pipe gasket: Pipe gaskets are helpful for sealing out air from your pipes.
How long does it take?
Installing pipe insulation will vary depending on the type of insulation you’re using, the size of your pipes, and the method you use to insulate them. If you choose to insulate your pipes from scratch, you’ll need to find a way to cover the pipes outside your home. They can be covered with a variety of different materials, including urethane, mineral wool, expanded polystyrene, or polyurethane. DIY pipe insulation takes between one to two hours to install.
Pipe insulation kits, on the other hand, take between three to six hours to install. If you’re insulating your pipes using a DIY pipe insulation kit, you’ll need to cover your piping outside your home and then take them back inside again. Insulating your pipes can be a lengthy process, so it’s important to schedule the job for a time when you won’t be interrupted. Keep track of how long everything takes so you can finish insulating your pipes as quickly as possible.
Tips for installing pipe insulation
- Use the same type of pipe insulation in all of your pipes. This will help insulate all of your pipes as efficiently as possible.
- Make sure your pipes are full of water. This will help your pipes expand as you insulate them and make the job much easier.
- Make sure there’s no dirt or debris in your pipes. This will cause the insulation to bunch up in your pipes, which will make your job much more difficult.
- Cover all of your bases. This means caulking your pipes, insulating your electrical wiring, and covering your electrical switches and outlets.
- Plan ahead. This means scheduling your pipes’ insulation job for a time when your family won’t be disturbed.
Conclusion
Insulating your home’s pipes is a critical step in creating a comfortable home environment. Pipe insulation helps keep your home’s heat inside, while keeping cool air outside. It also protects your pipes from damage, and can help prevent your pipes from bursting. Pipe insulation is available at most home improvement stores and online retailers, and is relatively easy to install. It can be installed by the homeowner, and can significantly extend the life of their home.

